4. Activate The Service
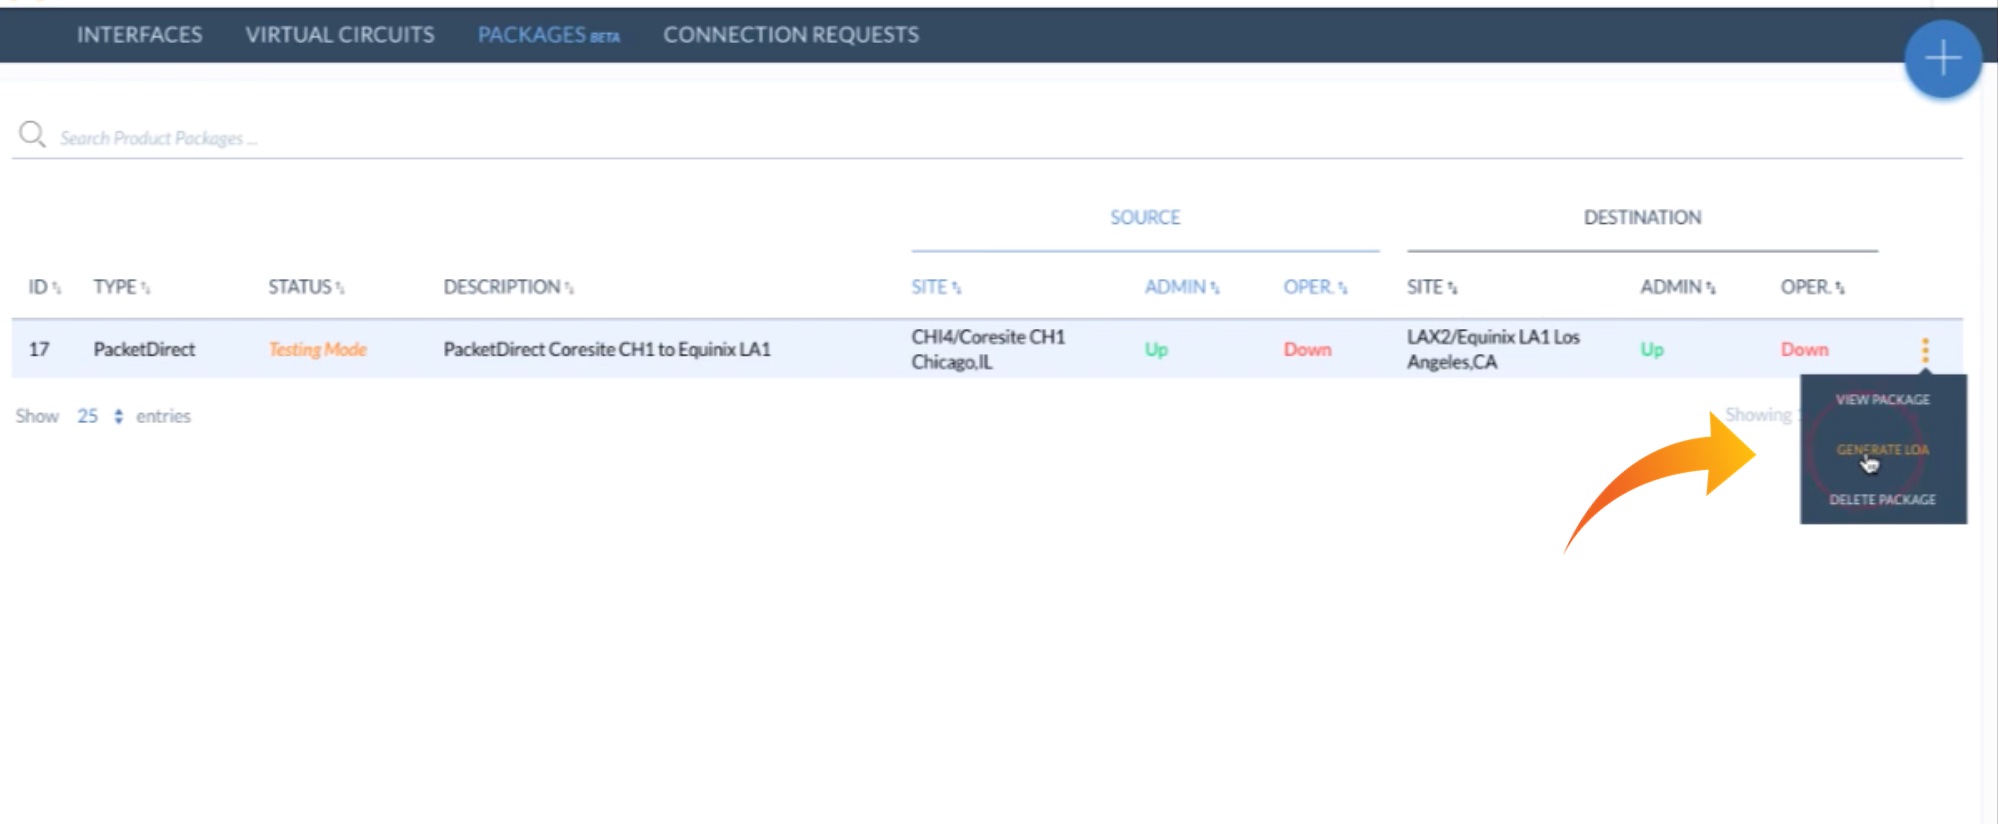
Once our PacketDirect service is finished provisioning, we generate the Letters of Authorization (LOAs). We do that by clicking on the three dots on the far right-hand side and choosing ‘generate LOA:’
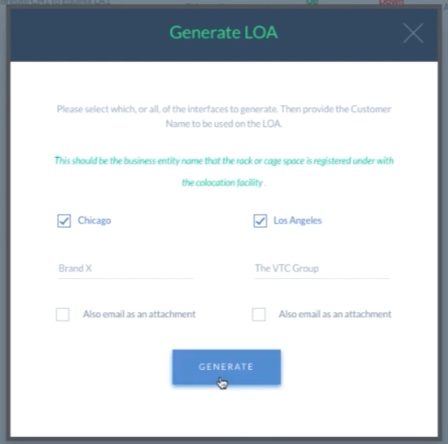
We’ll now choose to:
- Generate the LOA for both sides at the same time, without selecting the option to email as an attachment
- Change who the LOA is made out to. (If, for instance we’re known as a different name at a facility we can go ahead and enter that name, as we’ve done below – “Brand X.“)
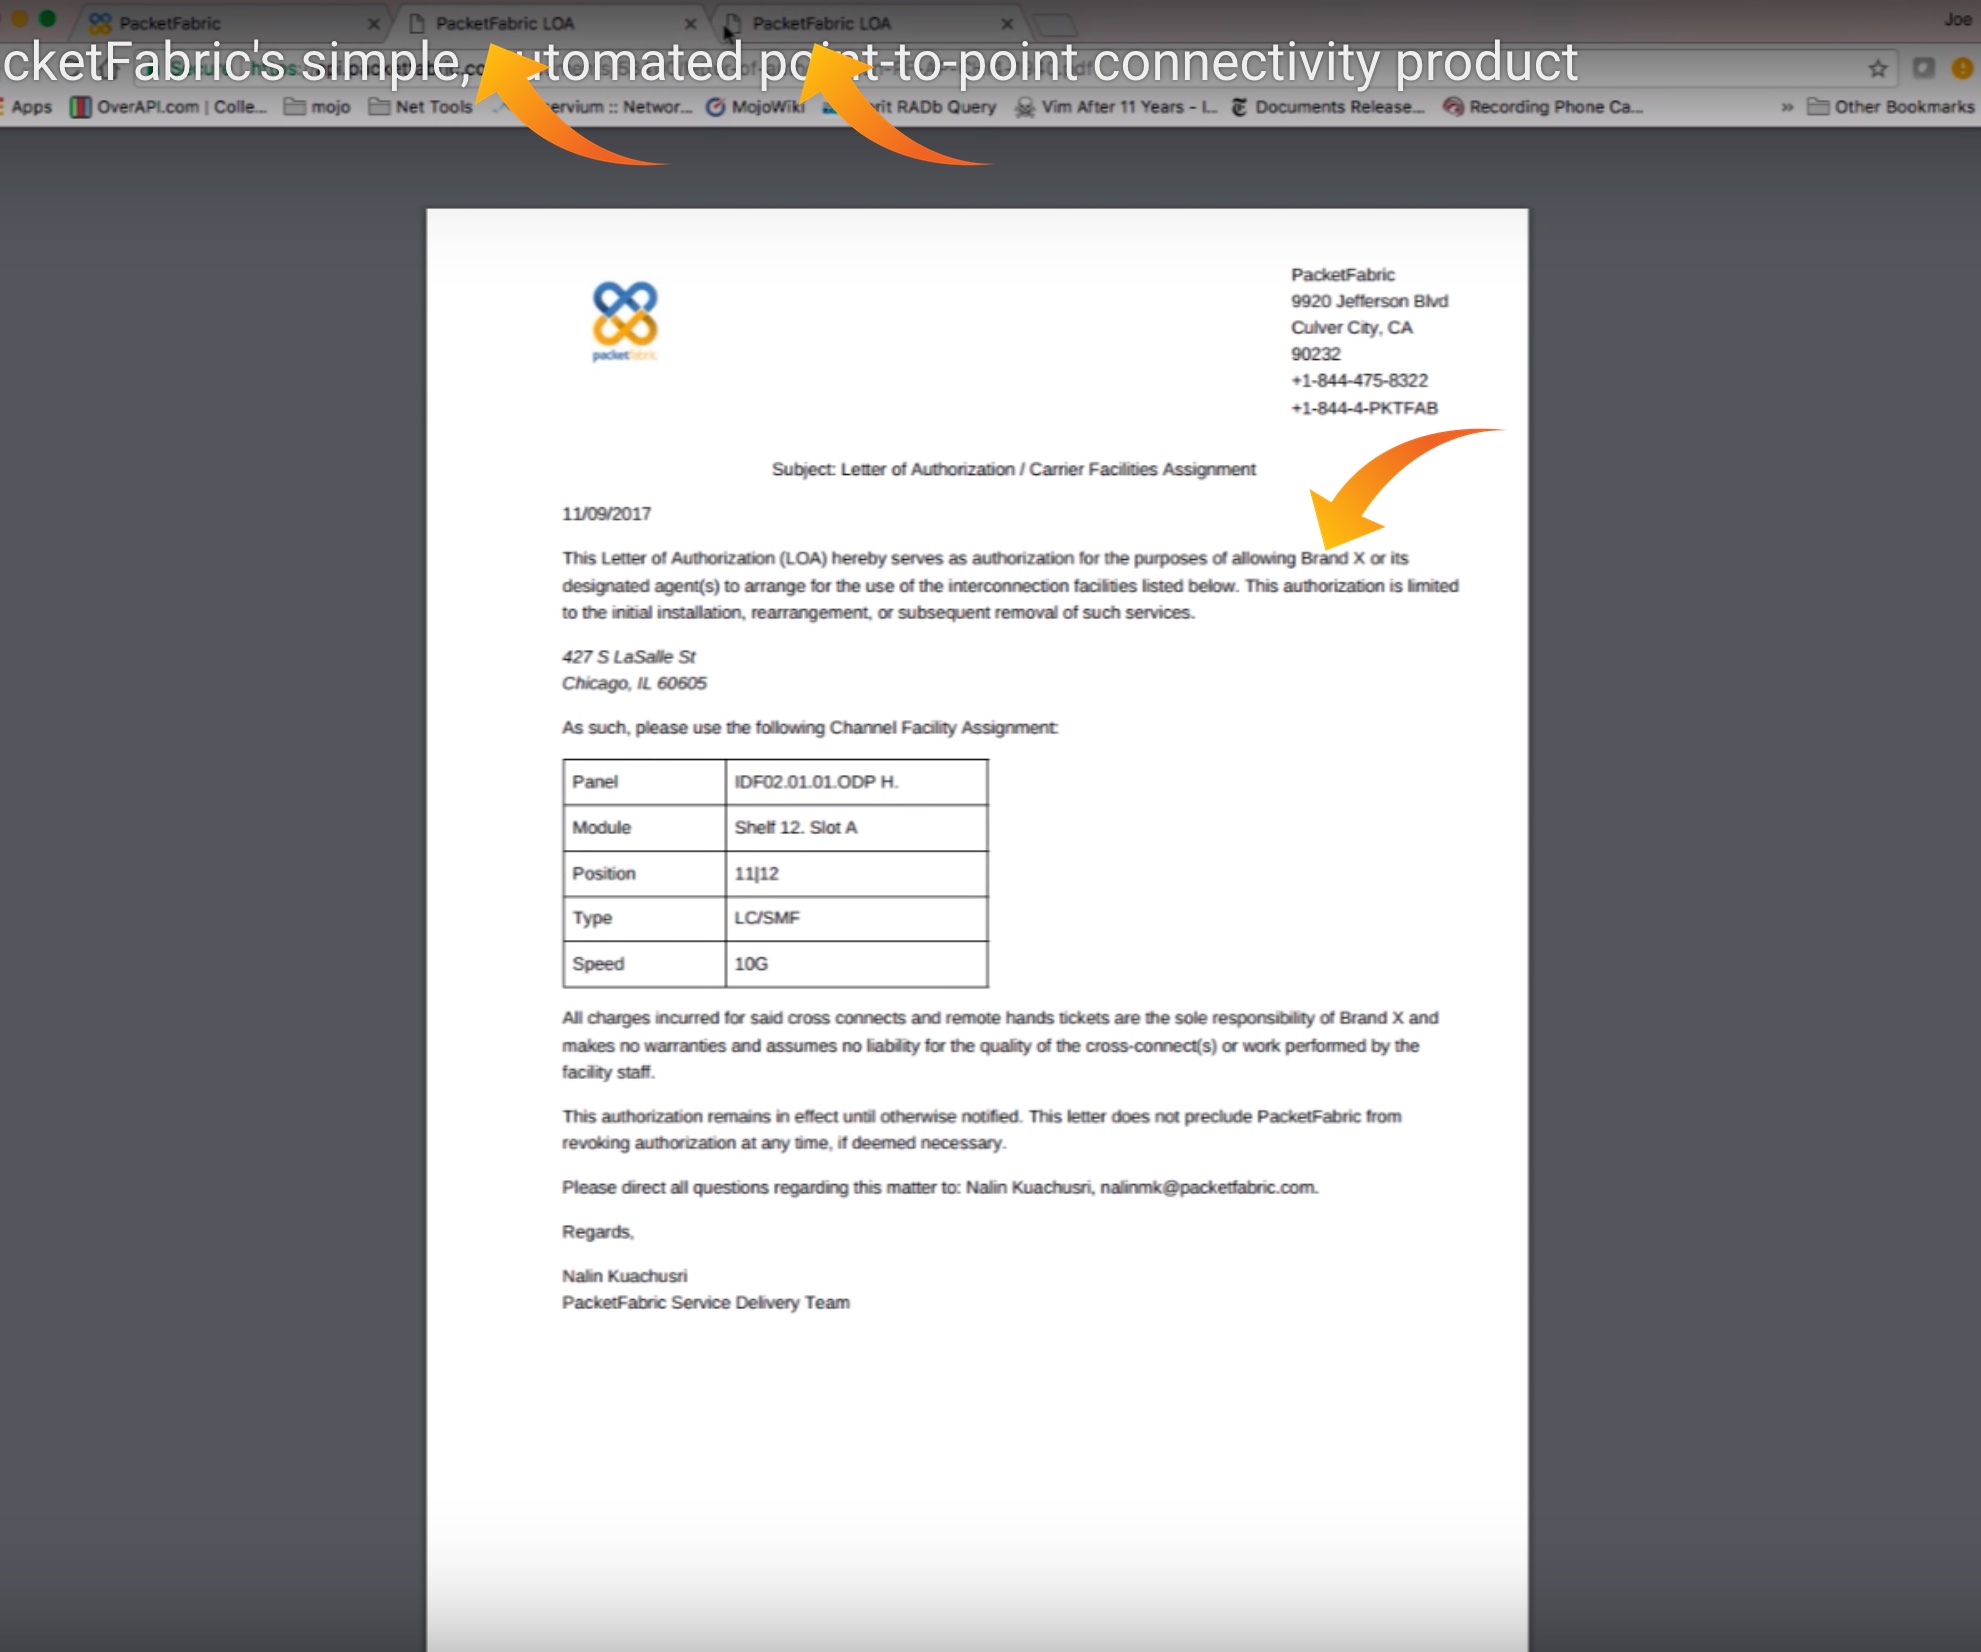
Note that two tabs are created; these are our two LOAs, one of which is shown below, and that our changed name (“Brand X”) appears in the LOAs. We simply download them and send them in with our cross connect order.
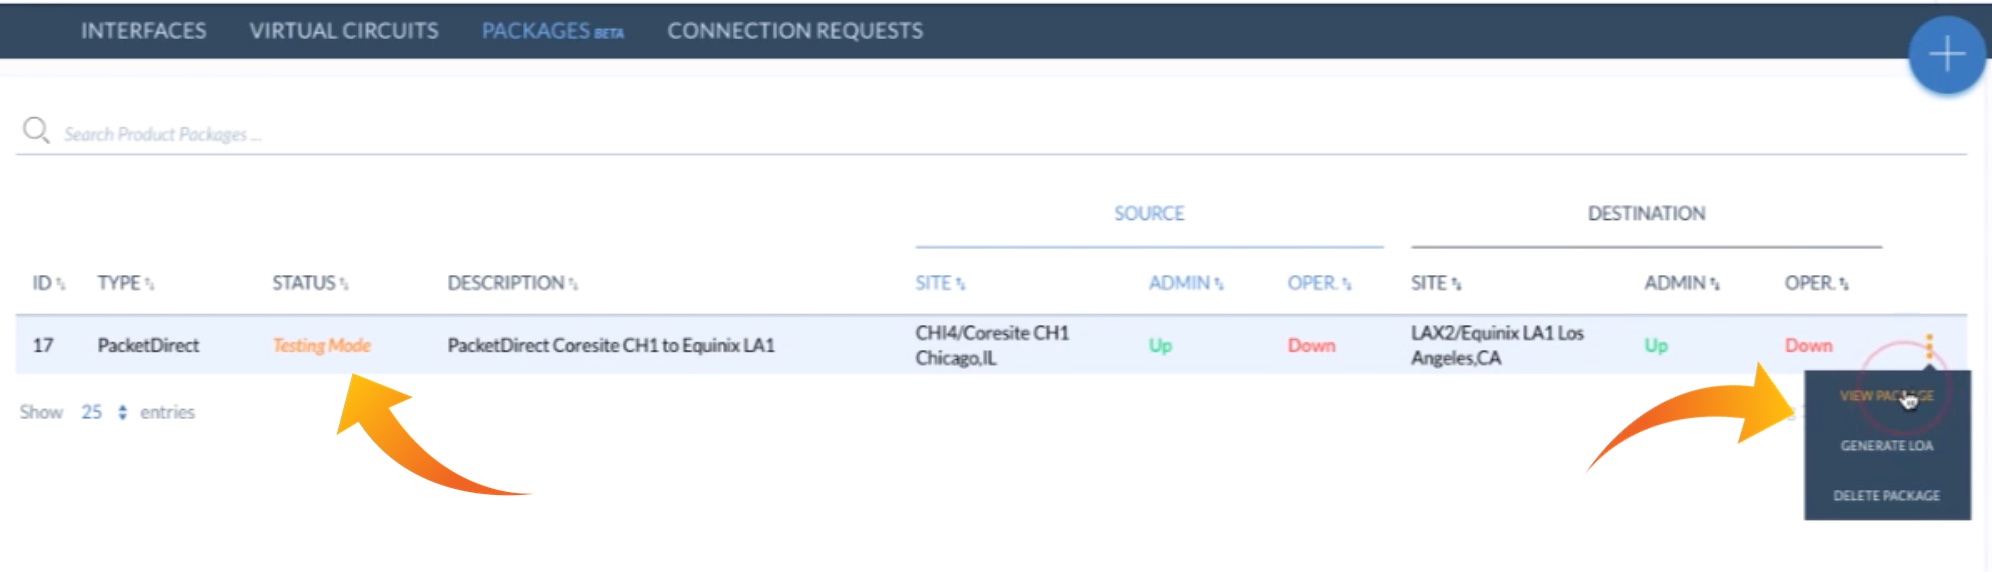
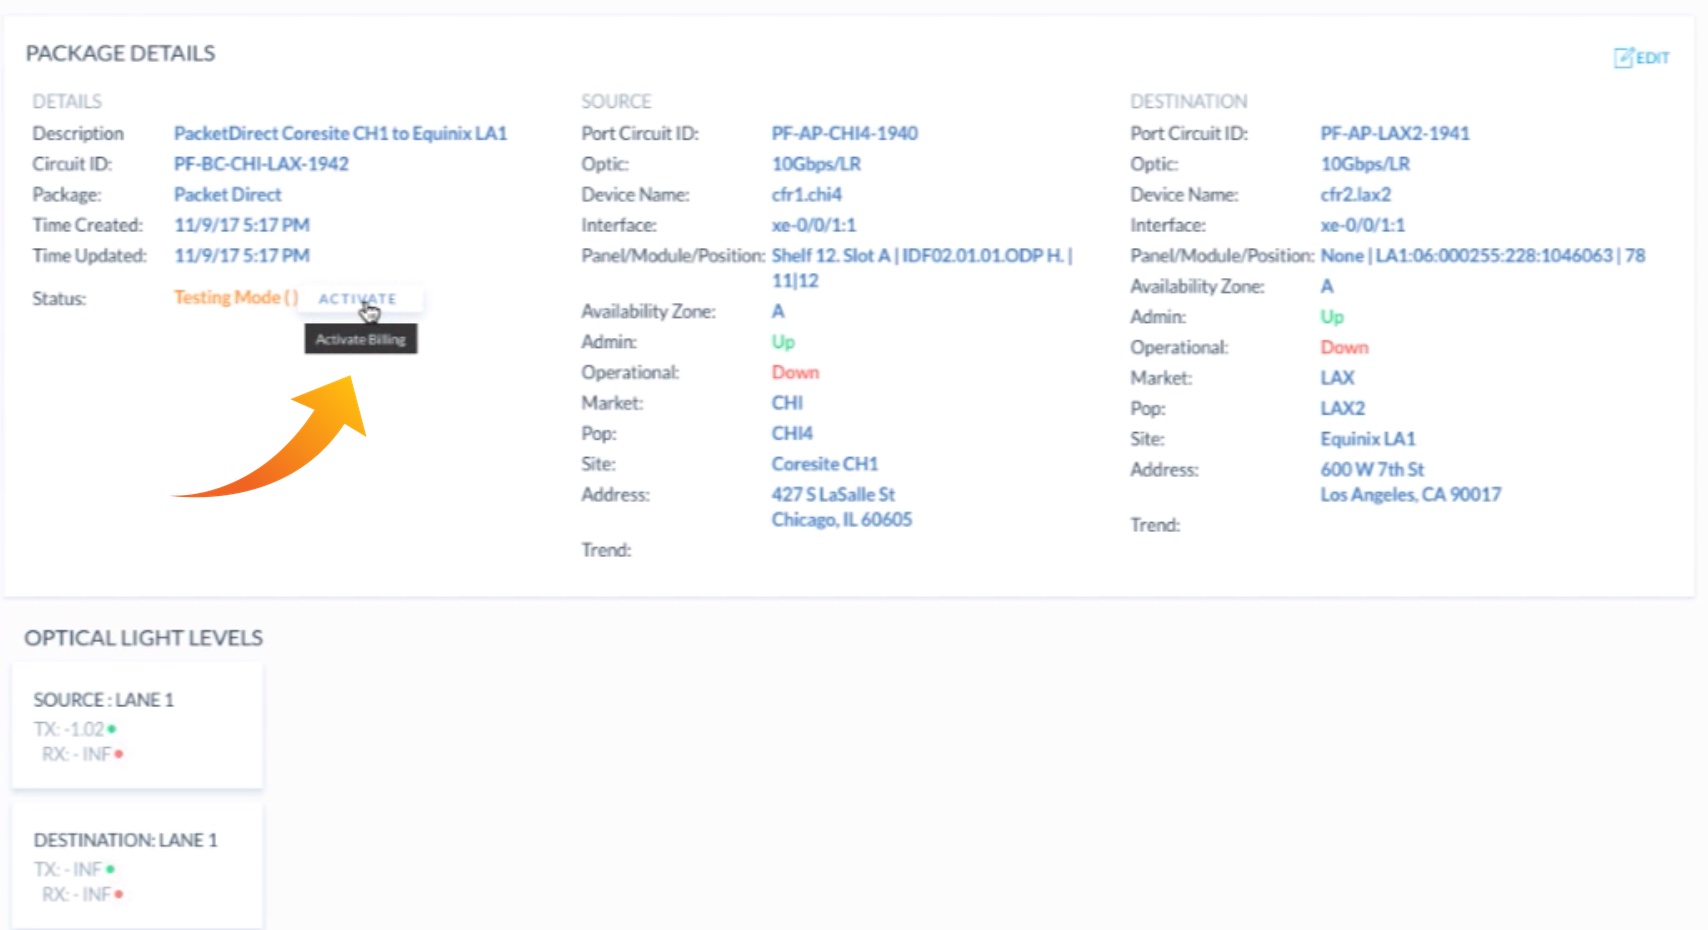
Before we can pass traffic on this PacketDirect service we must take it out of testing mode (indicated below under STATUS). We do that by coming back over to the right, clicking on the three dots, and selecting ‘View Package:’
This loads the Package Details screen. All we need do now is to click on ACTIVATE to activate the service:
And that’s all there is to it!